Friday, November 16, 2018

Concept of Menusuites is not supported in Webclient (AL Language Extension)

Yes, this is true Menusuite is no longer available to control whether a page or report can be searchable in Web client.

So, we may have some question on our mind:
  • What is the alternate of Menusuite? 
  • How we will control Pages and Reports Searchable in Web client? 
  • What code we will write in AL language to make it happen?
And, answer is here: Microsoft has provided the way to handle it and make the Pages & Reports searchable through Web client.

Way 1: New property "UsageCategory" added to Page & Reports. By default this property is set to None when you create new Page or Report.

Below are list of UsageCategory value, that you can set and make the Page or Report searchable / see like appear in Department page like RTC client.
  • None
  • Lists
  • Task
  • ReportsAndAnalysis
  • Document
  • Administration
For example, we can write below code snippet in Page & Report development to make it searchable in Web client:

page 50110 MyVendorCard
{
PageType = Card;
SourceTable = Vendor;
UsageCategory = Documents;
ApplicationArea = All;
layout
{
area(content)
{
group(General)
{
field("No."; "No.") { }
field(Name; Name) { }
field(Address; Address) { }
}
}
}
}


Now, you may try and check with your own development...

Way 2: Another way, you can extent Navigation Pane page of existing role centre and/or adding actions to other existing pages.

Adding to the top level Navigation by extending RC:

pageextension 50111 MyPurchAgentRoleCenter extends "Purchasing Agent Role Center"
{
actions
{
addlast(Sections)
{
group("My Venodors")
{
action("Item Vendor Catalog")
{
RunObject = page "Item Vendor Catalog";
ApplicationArea = All;
}
}
}
}
}


Adding to the secondary level Navigation by extending RC:

...
addlast(Embedding)
{
action("Vendor Bank Account List")
{
RunObject = page "Vendor Bank Account List";
ApplicationArea = All;
}
}


Adding to Action by extending Page or RC:

addlast(Creation)
{
action("Vendor Item List")
{
RunObject = page "Vendor Item List";
ApplicationArea = All;
}
}


Source of above post: https://docs.microsoft.com/en-us/dynamics365/business-central/

Please explore above link to know in details.

Connecting to Business Central On-premises through Mobile App

 Below are steps to connect Business Central On-premise through Mobile App.

We will connect mobile app with our on-premise Business Central hosted on local machine / network. Our mobile device must be in same network connected through WiFi or VPN or any.

I am demonstrating this scenario with my Laptop & Mobile connected through mobile Hotspot (both device sharing same network).

Step 1: Connect your laptop (which is already installed with Business Central) with you mobile Hotspot.


Step 2: Get your laptop IP address. (You may run command "ipconfig" or find it through your network properties.)


Step 3: Check you can access Business Central web client with local IP.


Step 4: Install Business Central App in you mobile device. Ignore this step if already installed.


Step 5: Open Business Central App in your mobile device:


Step 6: Click / tap on highlighted area (reason we are not going to connect it to hosted / Azure / Cloud)


Step 7: Enter or Paste Web Client URL in Service Name and tap to ->


Step 8: Enter credentials (Windows or what you have set in configuration). I am using Window User ID & Password.


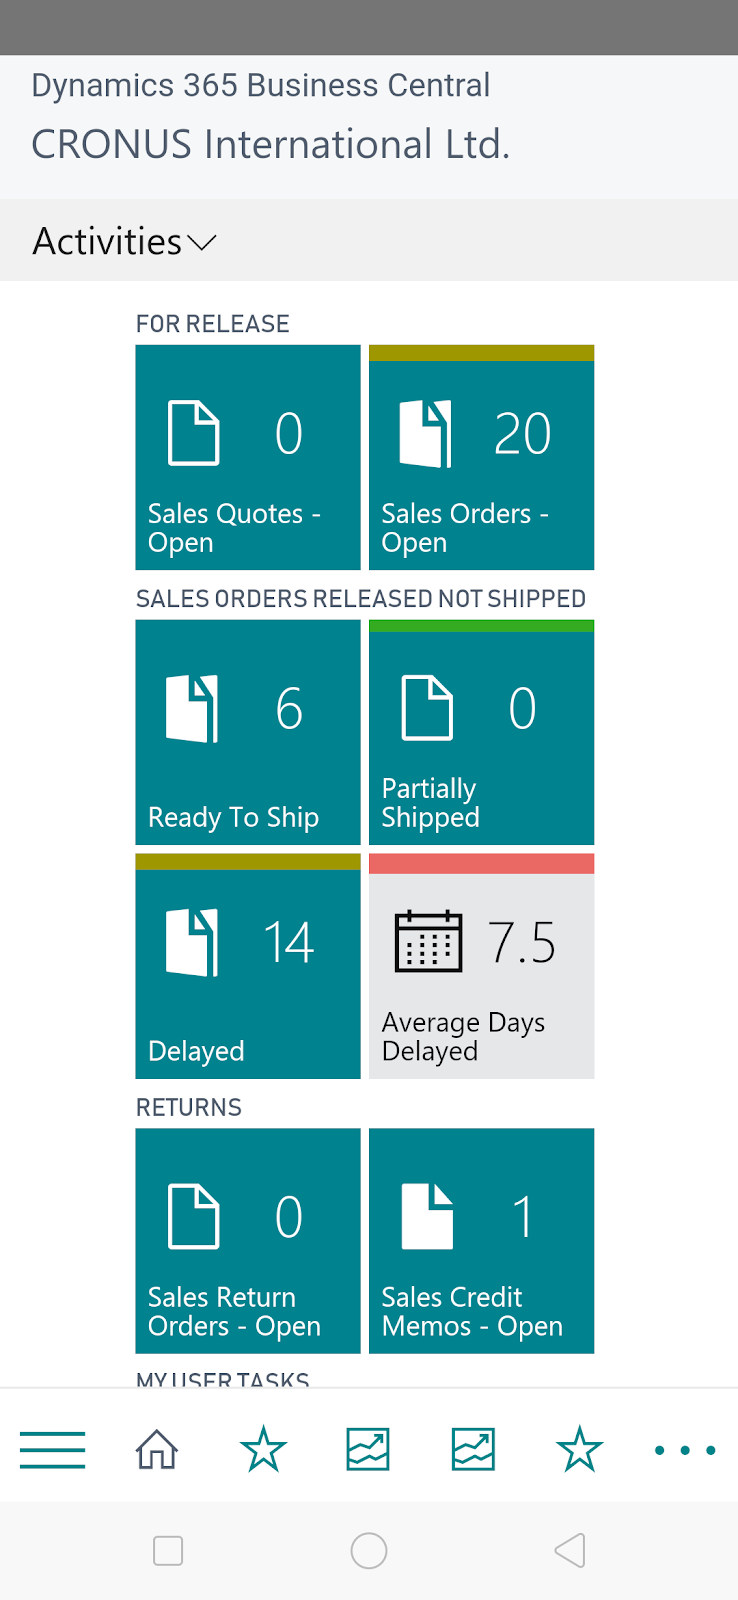
Step 9: Tap next to connect and with till home screen appear.


Step 10: Bingo! Now explore app and enjoy BC


Please do share your feedback. It will encourage & help me a lot. Thanks! keep reading... more posts are on the way...


Wednesday, November 14, 2018

Reports in Extension using AL and Report Builder


How to create and design report in Business Central Extension using AL and Report Builder


Below are simple steps to create and design simple report in Business Central through AL & Report Builder. Even in C/AL we were designing reports layout in report builder. Same process has been provided with AL as well, where we will define data items & logic in AL code, later we will design layout in Report Builder. Finally, we will publish / build our report extension.


I will try to demonstrate below sample with AL & Report Builder together:


Step 1: Copy and Paste (Write) below code in AL (Visual Studio Code):


report 50101 "My Customer List"
{
    CaptionML = ENU = 'My Customer List';
    RDLCLayout = 'My Customer List.rdl';
    dataset
    {
        dataitem(Customer; Customer)
        {
            RequestFilterFields = "No.", "Search Name", "Customer Posting Group";
            column(CompnayName; COMPANYNAME)
            {
            }
            column(Customer_TABLECAPTION_CustFilter; TABLECAPTION + ': ' + CustFilter)
            {
            }
            column(CustomerNo; "No.")
            {
            }
            column(PostingGrou; "Customer Posting Group")
            {
            }
            column(Balance__LCY_; "Balance (LCY)")
            {
            }

            trigger OnAfterGetRecord();
            begin
                CalcFields("Balance (LCY)");
            end;

        }

    }
   
    requestpage
    {
        SaveValues = true;

        layout
        {
        }

        actions
        {
        }

    }

    labels
    {
    }

    trigger OnPreReport();
    var
        CaptionManagement: Codeunit 42;
    begin
        CustFilter := CaptionManagement.GetRecordFiltersWithCaptions(Customer);
    end;

    var
        CustFilter: Text;
}


Step 2: Save (Ctrl + S) and Build your extension (Ctrl + Shift + B) to generate “My Customer List.rdl”


Step 3: Open Report Builder 2016 and open “My Customer List.rdl” file from AL Project directory (for my case, I have saved my project in C:\Users\UserID\Documents\AL\ALProject2).


Find the report builder from app list:


Open “My Customer List.rdl” from project directory:


Design layout with published data sources & datasets:


Save and close the Report Builder.


Step 4: Attach report to page extension (initial Hello World J extension):


pageextension 50100 CustomerListExt extends "Customer List"
{
    actions
    {
        addlast(Navigation)
        {
            action("My Customer List")
            {
                ApplicationArea = All;
                RunObject = report "My Customer List";
                Image = "Report";
            }
        }
    }

    trigger OnOpenPage();
    begin
        Message('[Business Central] App published: Hello world');
    end;
}


Step 5: Build your extension & deploy (Shift + F5 / F5) to Business central. Check the page and run you report:


J Here you have done 1st report walk-through. Enjoy and keep extending Business Central using AL (Visual Studio Code)…

Tuesday, October 2, 2018

Application Management Codeunit Replacement

What does it mean: Application Management Codeunit Replacement

Yes, it's true. Application Management Coueunit 1 is no more exists in Dynamics 365 Business Central.

What's about the function? 
Are they exists? 
Where these are placed now? 
.
.
To many questions????

Don't worry, see this link - Codeunit 1 Replacement

Does this transition impact upgrade. Yes, see the solution as well in that link. 

How does these transition made? Where are those functions?

All available triggers / functions / events are now placed in System Codeunit and Management Codeunits.

See this link to get the details - Transitioning from Codeunit 1 to System Codeunits

Below are list of management codeunits where triggers / functions / events are moved now (except System Codeunits):

Type ID Name
Codeunit 40 LogInManagement
Codeunit 41 TextManagement
Codeunit 42 CaptionManagement
Codeunit 43 LanguageManagement
Codeunit 44 ReportManagement
Codeunit 45 AutoFormatManagement
Codeunit 49 GlobalTriggerManagement
Codeunit 50 SaaS Log In Management
Codeunit 79 Sales-Post and Send
Codeunit 2501 ExtensionMarketplaceMgmt
Codeunit 6710 ODataUtility
Codeunit 9015 Application System Constants
Codeunit 9170 Conf./Personalization Mgt.
Codeunit 9180 Generic Chart Mgt
Codeunit 9500 Debugger Management
Codeunit 9650 Edit MS Word Report Layout
Codeunit 9701 Cue Setup
Codeunit 9900 Data Upgrade Mgt.

Saturday, September 15, 2018

Business Central Administration - Extended Feature

Extended feature of Business Central Administration

Dear Friends, I have something to share with you. Many of us have already gone through these setups and must have seen it while configuring service. Still, curiously I am sharing these interesting features to you...

Have a look on General tab of Service console, you will notice few additional feature and some of change in value setting:

1. Century Cutoff for 2-Digit Years: <New Feature>

Specifies the last year of the 100-year range for representing two-digit years.  This setting determines how two-digit years in dates that are entered in the client are interpreted. For example, the default value is 2029. This means that two-digit years are interpreted as a year between 1930 and 2029. If you set the value to 2050, two-digit years are interpreted as a year between 1951 and 2050.

2. Diagnostics Trace Level for external proxies: <New Feature>

Specifies the diagnostics trace level for external proxies.

3. Non-Interactive Session Log Retain Time Interval: <New Feature>

Specifies the time interval that background and web service sessions remain in the Session Event table before they are deleted. This value has format d.hh:mm:ss. 

4. Server Instance Name: <New Feature>

Name of the server instance to connect to (for client) or listen to (for server). 

Now we can change the service name as well. 

5. Session Event Table Retain Time Interval: <Change in Feature>

Specifies the time interval that sessions in the Session Events table remain before they are deleted. This value has format d.hh:mm:ss.

Compare to previous version, it was only month. 


Another changes you can see in Database tab:


1. Search Timeout: <New Feature>

Specifies the amount of time that a search operation on lists in the client will continue until it is terminated.

The value has the format HH:MM:SS.


2. SQL Bulk Import Batch Size: <New Feature>

Specifies how many SQL memory chunks a data import must be distributed across. A small number increases the number of network transfers and decreases performance, but also lowers the amount of memory that the server instance consumes. If the database is on SQL Server 2016 or later, a low value of Bulk batch size can lead to large data files. To not use batching, specify 0.


Next changes you can see in Report tab:

1. Enable Application Domain Isolation: <New Feature>


Specifies whether application domain isolation is used for rendering custom RDLC layouts. This setting pertains to on-premise installations only. Enabling application domain isolation provides a more secure and reliable environment for processing custom RDLC layouts; however, it can considerably increase the time it takes to render reports. This is the default setting. Disabling application domain isolation can improve the rendering time but might have a negative impact on security and reliability.


Friends, now time to have a look and experience the new addition and changes.